TL;DR
Pour-over coffee offers a clean, nuanced flavor by manually controlling brewing variables. With basic equipment and technique, you can craft a rich cup tailored to your taste, making it ideal for coffee lovers who want control and quality.
Start with a simple setup: a dripper, filter, kettle, scale, and fresh beans.
Use a consistent ratio—about 20 grams coffee to 300 grams water—as your baseline.
Grind medium-coarse, like sea salt, and adjust based on your brew time and taste.
Pour slowly and evenly, allowing the coffee to bloom and extract optimally.
Troubleshoot by tweaking grind size, pour rate, and water temperature until you find your sweet spot.
Pour-Over Coffee: A Complete Beginner’s Walkthrough
Pour-over coffee gives you a clean, nuanced cup by letting you control the variables that matter: ratio, grind, water, time, and pour. Start simple, measure consistently, and use taste as your feedback loop.
Precision turns water and grounds into clarity, sweetness, and a cup that tastes intentionally made.
Reliable starting point for one generous cup.
Push toward 340g for a lighter brew.
Lets trapped CO2 escape before extraction.
Medium to medium-coarse is the first setting to try.
Pour rate, timing, temperature, and contact time are yours.
The Small Kit That Makes the Big Difference
Begin with dependable basics. You do not need a studio-level coffee bar; you need tools that make each brew repeatable enough to learn from.
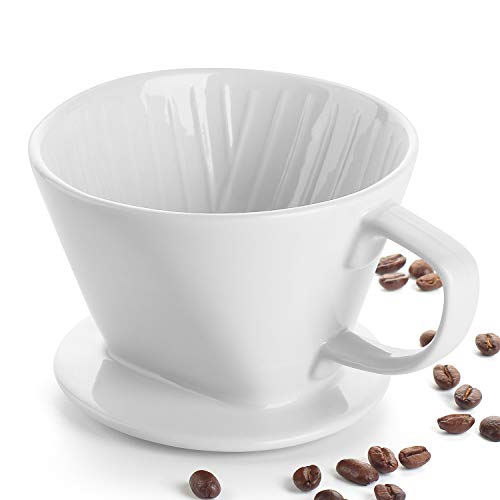
Dripper + Filter
A V60, Chemex, Kalita Wave, or simple cone dripper holds the bed shape and controls flow. Rinse the paper filter to remove papery taste and warm the vessel.
Scale + Timer
Measure coffee and water by weight. Timing helps you spot whether the brew is running too fast, too slow, or right in the balanced zone.
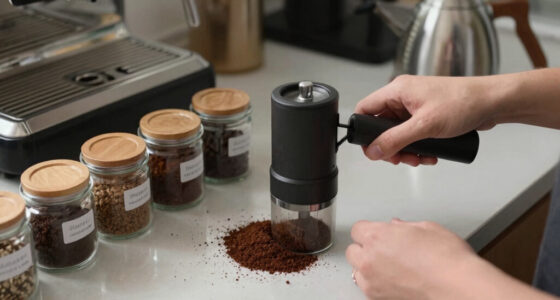
Burr Grinder
Consistent grounds extract evenly. Aim for medium-coarse particles like sea salt, then adjust one step at a time based on flavor.
Gooseneck Kettle
A narrow spout gives you gentle, even control over where the water lands and how quickly it moves through the coffee bed.
Fresh Beans
Use high-quality coffee roasted within the last month. Grind immediately before brewing to preserve aroma and sweetness.
Clean + Filtered
Water carries the flavor. If tap water tastes flat, mineral-heavy, or chlorinated, filtered water can make the cup noticeably cleaner.
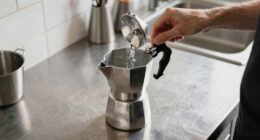
DOWAN Pour Over Coffee Maker, Non-Electric Pour Over Coffee Dripper, Manual Brew Maker, Single Cups Porcelain Slow Brewing Accessories for Gifts,White
Portable Handmade Brew – DOWAN ceramic pour-over coffee dripper lets you have a traditional, hands-on brewing experience. You…
As an affiliate, we earn on qualifying purchases.
As an affiliate, we earn on qualifying purchases.
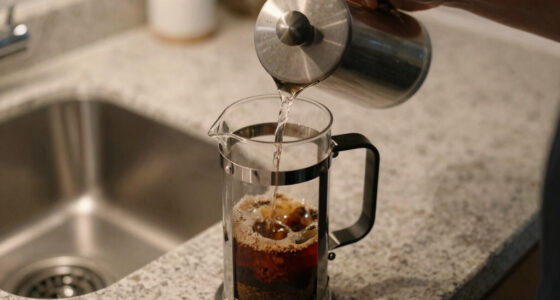
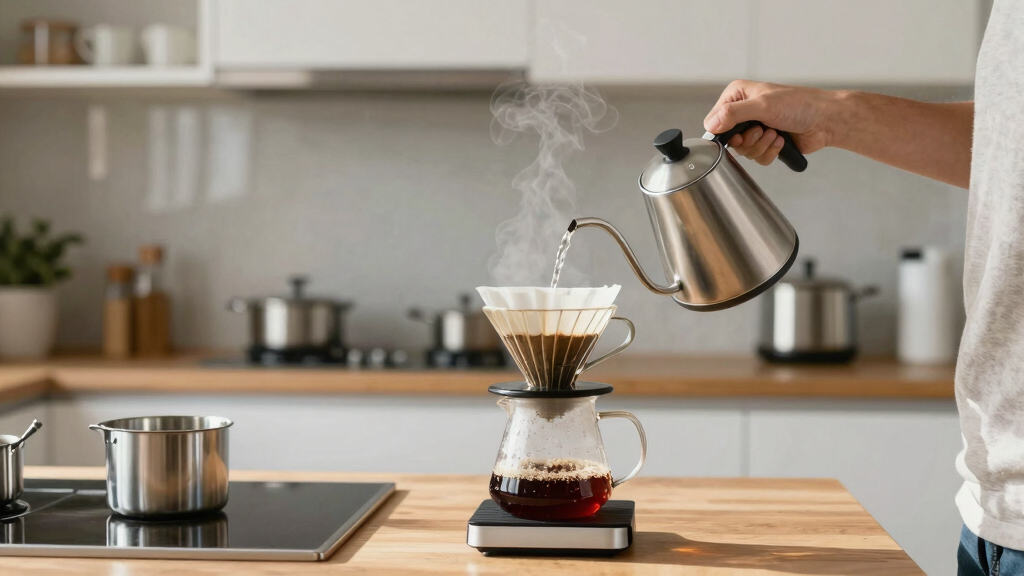
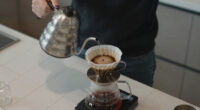
Your First Pour-Over, Step by Step
Keep the sequence steady for your first few brews. Once you can repeat it, small changes become useful instead of random.
Set
Place the dripper on a mug or server, add the filter, rinse with hot water, then discard the rinse water.
Dose
Add 20 grams of medium-coarse coffee. Level the bed gently so water hits the grounds evenly.
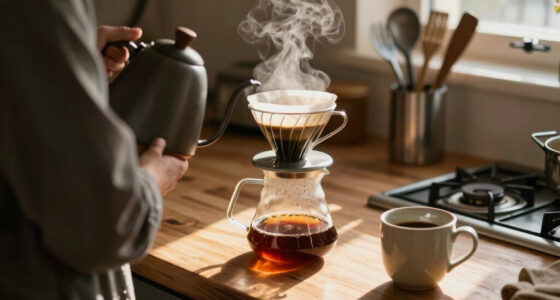
Bloom
Pour about 40 grams of water, saturate all grounds, and wait 30 seconds while the coffee degasses.
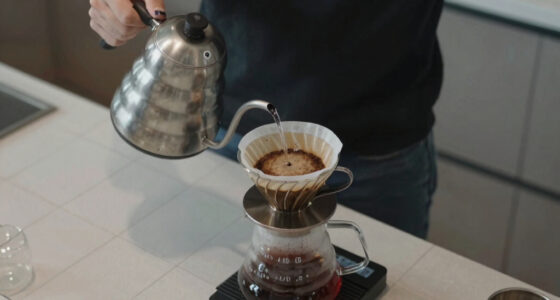
Pour
Add the remaining water slowly in gentle circles until the scale reads 300 grams.
Drain
Let the bed finish dripping. Taste, note the result, and adjust only one variable next time.

Gooseneck Kettle for Manual Drip Coffee & Tea 40oz Stainless Steel Pour Over Coffee Kettle with Thermometer Tea Kettle for Stovetop,1200ml,6 Cup,Silver,1Pack
ENJOY BETTER COFFEE AT HOME: The coffee pot is designed with a gooseneck spout. This kind of gooseneck…
As an affiliate, we earn on qualifying purchases.
As an affiliate, we earn on qualifying purchases.
The Levers That Shape Flavor
Pour-over rewards attention because each variable changes extraction. Use this as your tasting map when the cup feels bitter, sour, thin, or dull.
Control Impact
These are the highest-value adjustments for beginners. Grind size and ratio usually change the cup fastest.
Brew-Time Sweet Spot
A typical target is 2.5 to 4 minutes. Faster brews often taste sour or weak; slower brews often taste bitter or dry.
If your brew passes 4 minutes and tastes harsh, coarsen the grind. If it finishes under 2 minutes and tastes sharp, grind finer or slow the pour.

Maestri House S2 Espresso Coffee Scale with Timer, USB-C Rechargeable 2kg/0.1g Precision Shot Scale, Digital Scale for Espresso Brewing(Black & Silver)
【Ultra Small, Yet Professional】The Espresso Scale is small enough to fit in your palm. It measures 4.13*4.13*0.78 inches…
As an affiliate, we earn on qualifying purchases.
As an affiliate, we earn on qualifying purchases.
Manual Pour-Over vs. Automatic Drip
Neither method is universally better. Pour-over favors clarity and control; automatic drip favors ease and repeatable convenience.
| Feature | Pour-Over | Automatic Drip | Beginner Read |
|---|---|---|---|
| Control | High: pour rate, water temperature, timing | Low: mostly preset by the machine | ✓ Best for learning variables |
| Flavor Clarity | Excellent: highlights nuance and brightness | Good: often less detailed | ✓ Strong choice for specialty beans |
| Time | Longer: usually 3 to 4 minutes | Faster: usually 2 to 3 minutes | ~ Depends on your morning |
| Ease | Requires practice and attention | Very easy, almost automatic | ✗ Pour-over has a learning curve |
| Personalization | Very high: tweak each cup to taste | Moderate: limited by machine design | ✓ Ideal for curious drinkers |

Gevalia Special Reserve Guatemala Single Origin Medium Roast Coarse Ground Coffee (10 oz Bag)
One 10 oz bag of Gevalia Guatemalan Single Origin Special Reserve Coarse Ground Coffee
As an affiliate, we earn on qualifying purchases.
As an affiliate, we earn on qualifying purchases.
Fix the Cup Without Guessing
Bad cups are useful data. Change one thing, taste again, and let the next brew teach you what moved.
If It Tastes Bitter
The coffee is likely over-extracted. Water stayed in contact too long or the grind was too fine, pulling out harsh compounds.
- 1 Coarsen the grind by one setting.
- 2 Pour more gently and keep the bed from clogging.
- 3 Aim to finish before the 4-minute mark.
If It Tastes Sour
The coffee is likely under-extracted. Water moved through too quickly or the grounds were too coarse to dissolve enough sweetness.
- 1 Grind slightly finer for more surface area.
- 2 Pour slower to increase contact time.
- 3 Check that all grounds are evenly saturated.
Questions Beginners Ask First
The short version: use fresh beans, clean water, a repeatable ratio, and notes. The rest becomes easier with each brew.
Is pour-over coffee better than drip coffee?
It often tastes brighter and cleaner because you control every step. Whether it is better depends on whether you value nuance or convenience more.
Can I make it without special equipment?
Yes. A simple cone dripper, paper filters, a kettle, and fresh coffee are enough to start. A scale and burr grinder improve consistency quickly.
What beans work best?
Fresh, high-quality beans are ideal. Single-origin coffees can be especially rewarding because pour-over highlights subtle fruit, floral, and sweetness notes.
How do I improve every time?
Keep the setup clean, grind right before brewing, change one variable at a time, and write down ratio, grind, time, and taste.
What equipment do you actually need to start?
Pour-over coffee requires just a few key tools. A good dripper like a V60 or Chemex, some filter papers, a gooseneck kettle for precise pouring, a burr grinder, a scale, and a timer. These essentials set the stage for control and consistency. For example, a basic setup with a V60 dripper, paper filters, and a kettle can produce excellent results for under $50, making it accessible for most beginners.
How to measure your coffee and water for perfect balance
Start with a 1:15 to 1:17 ratio—think 20 grams of coffee for about 300-340 grams of water. Use a scale for accuracy. This ratio is crucial because it directly affects the strength, clarity, and overall flavor profile of your brew. Too much water relative to coffee can dilute the flavors, making the cup weak and flat, while too little can result in an overly strong, bitter taste. Achieving and maintaining this balance allows you to bring out the nuanced flavors in your beans, emphasizing brightness, sweetness, or body depending on your preference. Consistent measurements are your best friend—small deviations can significantly alter the final taste, so precision is key for reproducibility and understanding how each variable influences the outcome.
What grind size works best and why it matters
Medium to medium-coarse grind—similar to sea salt—is ideal because it provides a balance between extraction speed and flavor development. If your grind is too fine, the water struggles to pass through, resulting in over-extraction, which extracts bitter compounds and can make your coffee harsh. Conversely, a grind that’s too coarse causes the water to flow too quickly, under-extracting the coffee and leaving it weak or sour. The grind size directly influences how the water interacts with the coffee grounds, affecting extraction time and flavor clarity. Adjusting grind size allows you to fine-tune the brew to match your taste preferences and equipment variables. For example, if your brew consistently takes longer than 4 minutes and tastes bitter, coarsening the grind can help speed up the process and improve flavor balance. Understanding this tradeoff helps you control the complexity and richness of your coffee, making grind size a fundamental lever for brewing excellence.
Step-by-step: How to brew your first pour-over
- Set up your dripper on a mug or server.
- Place a filter inside and rinse it with hot water to eliminate paper taste and preheat the equipment. This step ensures the final brew isn’t affected by papery or off-flavors and helps maintain consistent temperature during brewing.
- Grind your coffee to medium-coarse and add 20 grams.
- Pour just enough hot water (about 40 grams) to saturate grounds, then wait 30 seconds for the bloom—the coffee releases CO₂, swelling and bubbling. This degassing process is vital because it allows gases that can cause uneven extraction to escape, ensuring a more uniform and flavorful brew.
- Slowly pour remaining water in a gentle, circular motion, maintaining a steady flow until you reach your target weight. This controlled pouring affects extraction rate and flavor clarity, with a steady, even pour helping avoid over- or under-extraction.
- Allow the coffee to finish dripping through, then enjoy your freshly brewed cup.
What are common pitfalls and how to fix them
Over-extraction leads to bitter, harsh flavors because the water has pulled out compounds that are undesirable in excess, such as tannins and certain acids. Fix it by coarsening the grind or pouring more gently to slow the extraction process, emphasizing sweeter, more balanced flavors. Under-extraction makes the coffee taste weak, sour, or flat, because not enough of the desirable soluble compounds have been dissolved. Fix it by grinding finer or pouring more slowly to increase contact time, extracting more of the nuanced flavors. Brews that take too long (over 4 minutes) often indicate the grind is too fine or the pour rate too slow, resulting in over-extraction. Conversely, quick brews under 2 minutes suggest the grind is too coarse or the pour too rapid, leading to under-extraction. Small adjustments in grind size, pour technique, and timing dramatically influence the final taste, so experimenting and tasting are essential for refining your process and achieving a harmonious balance.
How to tweak your brew for different flavors
Adjust variables like grind size, pouring speed, and water temperature to highlight or mellow specific flavor notes. For brighter, more floral and fruity profiles, use a slightly finer grind and hotter water to extract delicate compounds without overwhelming the palate. For a smoother, richer, and more rounded flavor, coarsen the grind and pour more slowly, allowing the extraction to be more controlled and balanced. Keeping detailed notes on each brew—such as grind setting, water temperature, pour rate, and timing—helps you recognize patterns and tailor your process to emphasize desired flavors. For instance, a light roast with complex fruit notes may benefit from a hotter, slightly finer brew to unlock its full potential, while a dark roast might require a coarser grind and slower pour to prevent bitterness. This experimentation deepens your understanding of how each variable influences flavor, empowering you to craft a personalized, nuanced cup every time.
Comparison: Manual pour-over vs. automatic drip
| Feature | Pour-Over | Automatic Drip |
|---|---|---|
| Control | High — pour rate, water temp, timing | Low — preset settings |
| Flavor clarity | Excellent — highlights nuance | Good — less nuanced |
| Time | Longer — 3-4 minutes | Faster — 2-3 minutes |
| Ease | Requires practice | Very easy, almost automatic |
How to make your pour-over taste better every time
Use fresh, high-quality beans roasted within the last month. Grind just before brewing for maximum flavor. Keep your equipment clean—residual oils can ruin taste. Adjust your pour technique and variables gradually, tasting as you go. Over time, you’ll develop a feel for what makes your perfect cup.
Frequently Asked Questions
Is pour-over coffee better than drip coffee?
Many say pour-over offers a brighter, cleaner flavor because you control every step. It emphasizes clarity and nuance, but whether it’s better depends on your taste. Some prefer the convenience of drip machines, but pour-over rewards attention and skill.
Can I make pour-over coffee without special equipment?
Absolutely. A simple cone-shaped dripper, some filter paper, and a kettle are enough to get started. Even a clean, heatproof mug with a makeshift filter can work in a pinch—though investing in proper gear improves consistency.
How do I fix a brew that tastes bitter or sour?
Bitter flavors often mean over-extraction—try coarsening the grind or pouring more gently. Sour or weak tastes suggest under-extraction—finer grind or slower pour helps. Small adjustments and tasting as you go are your best tools.
What beans should I use for pour-over?
Fresh, high-quality, single-origin beans roasted within the last month make the biggest difference. Light roasts showcase floral and fruity notes, while darker roasts deliver richer, bolder flavors. Experiment to find what suits your palate best.
Does water quality really matter?
Yes. Using clean, filtered water free from chlorine or impurities helps your coffee taste pure. Water makes up most of your brew—so don’t overlook its importance.