
TL;DR
Using a stovetop espresso maker involves filling the bottom chamber with water, adding finely ground coffee to the filter, assembling, and heating until the coffee bubbles into the top. Consistent technique guarantees rich, flavorful espresso without bitterness or over-extraction.
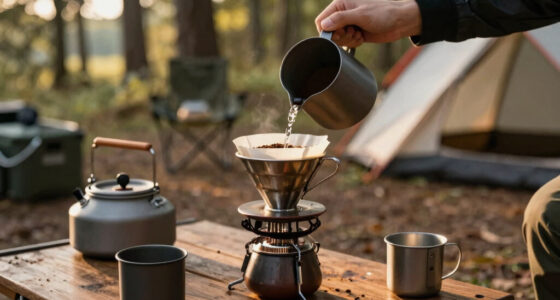
Ever watched a stovetop espresso maker and wondered how something so simple could produce such rich, aromatic coffee? It’s like turning raw materials into liquid gold with just a few straightforward steps. No fancy gadgets, no electricity—just your stovetop, some good coffee, and a little know-how.
In this guide, you’ll learn exactly how to use a moka pot step by step. Whether you’re off-grid, saving energy, or just love the ritual of manual brewing, mastering this process turns everyday mornings into a small, satisfying craft. Ready to brew like a pro? Let’s get started.
Use freshly ground, medium-fine coffee and don’t tamp it—just level it off.
Fill the water to the safety valve, never past it, to prevent overpressure or leaks.
Assemble tightly but avoid overtightening; your seal depends on it.
Control heat carefully—medium is usually best—and listen for the bubbling sound.
Clean your moka pot regularly, especially avoiding soap on aluminum models, to keep flavors pure.
How to Use a Stovetop Espresso Maker Step by Step
Turn a Moka Pot Into Rich, Aromatic Coffee
A stovetop espresso maker rewards small, careful choices: water to the safety valve, medium-fine coffee, no tamping, a snug seal, and patient medium heat. Follow the sequence and you get a bold espresso-style brew without bitterness, gadgets, or electricity.
Consistent technique is the difference between liquid gold and burnt coffee.
Core brewing principleKnow the Machine Before You Brew
A moka pot is simple, but it is still a pressure brewer. The three chambers, material, gasket, and valve all shape flavor, safety, and durability.
Bottom Chamber
Holds clean, cold water. Stop at the safety valve so pressure can build correctly without leaks or overflow.
Filter Funnel
Holds the coffee grounds. Fill it evenly, level the surface, and resist tamping so extraction stays balanced.
Top Chamber
Collects the finished coffee as it bubbles upward. Remove from heat before harsh sputtering takes over.

Primula Classic Stovetop Espresso and Coffee Maker, Moka Pot for Italian and Cuban Café Brewing, Greca Coffee Maker, Cafeteras, 6 Espresso Cups, Silver
CRAFT COFFEE AT HOME: Produces six demitasse/espresso servings of rich, smooth espresso coffee in minutes. Craft your own…
As an affiliate, we earn on qualifying purchases.
As an affiliate, we earn on qualifying purchases.
The Step-by-Step Brew Flow
Think of the process as a chain. Each step protects the next one: correct water supports pressure, correct grounds support flow, and controlled heat protects flavor.
Fill Water
Use cold, clean water up to the safety valve level.
Add Coffee
Use freshly ground medium-fine coffee and level it off.
Seal Snugly
Screw together firmly, like a jar lid plus a small extra turn.
Heat Gently
Place on medium heat and listen for steady bubbling.
Stop Early
Remove when the stream slows and sputtering begins.
Primula Classic Stovetop Espresso and Coffee Maker, Moka Pot for Italian and Cuban Café Brewing, Greca Coffee Maker, Cafeteras, 6 Espresso Cups, Silver
CRAFT COFFEE AT HOME: Produces six demitasse/espresso servings of rich, smooth espresso coffee in minutes. Craft your own…
As an affiliate, we earn on qualifying purchases.
As an affiliate, we earn on qualifying purchases.
Heat, Timing, and Extraction Control
Bitterness usually comes from too much heat, too fine a grind, packed grounds, or leaving the pot on the stove after the brew has peaked.
Common Flavor Risk Factors
Pro Timing Cues
Quiet pot, medium heat, pressure building below the grounds.
Coffee rises in a steady stream into the top chamber.
Sputtering begins. Lift the pot before the coffee tastes burnt.

Sivaphe 3 Cup Moka Pot Replacement Infuser Parts for Aluminum Italian Stovetop Espresso Coffee Maker, 1 Filter and 3 Silicone Gasket Seals
Only for aluminum Moka Pot Coffee Maker 3 Espresson Cup, not suit stainless steel moka pot, Please Note…
As an affiliate, we earn on qualifying purchases.
As an affiliate, we earn on qualifying purchases.
Do This, Not That
Small brewing choices compound quickly. This comparison table keeps the most common beginner mistakes visible while you build the ritual.
| Step | Best Practice | Risky Shortcut | Flavor Result |
|---|---|---|---|
| Water | ✓ Fill to the valve only | ✗ Cover the safety valve | Stable pressure and cleaner extraction |
| Coffee | ✓ Medium-fine, freshly ground | ~ Drip grind or powder-fine grind | Balanced strength without clogging |
| Basket | ✓ Level gently | ✗ Tamp hard like espresso | Smoother flow, less bitterness |
| Heat | ✓ Medium, steady flame | ✗ Blast high heat | Rich coffee without burnt notes |
| Cleaning | ✓ Warm rinse after every brew | ~ Soap on aluminum models | Cleaner aroma and longer pot life |

illy Ground Coffee Moka – 100% Arabica Flavored Coffee Ground – Rich Aromatic Coffee Grounds Profile – Classico Medium Roast – Notes of Caramel, Orange Blossom & Jasmine – No Preservatives – 8.8 Ounce
FRESH, RICH & BALANCED – illy ground moka coffee is an easy-to-prepare morning ritual. Classico, medium roast coffee…
As an affiliate, we earn on qualifying purchases.
As an affiliate, we earn on qualifying purchases.
Dial In the Sweet Spot
The ideal moka pot brew sits between weak under-extraction and harsh over-extraction. Medium heat and the right grind put you in the center.
Extraction Spectrum
Aluminum
Heats quickly and feels classic, but can stain or corrode over time. Rinse well and avoid soap to preserve flavor.
Stainless Steel
More durable, easier to clean, and often compatible with induction stoves. A strong choice for long-term daily use.
Trace the Ritual From Bean to Cup
A good moka pot routine is repeatable. Follow the same sequence and adjust only one variable at a time when refining flavor.
Beans
Freshly ground for aroma and oils.
Grind
Fine enough to extract, not clog.
Water
Clean, cold, and below the valve.
Seal
Snug threads and clean gasket.
Heat
Medium heat for calm pressure.
Cup
Pour immediately and enjoy fresh.
Fast Answers for Better Coffee
Use these checks when your brew tastes weak, burnt, slow, or inconsistent.
How do I prevent bitterness?
Use medium heat, avoid tamping, remove the pot at the first sputter, and rinse away old coffee oils after every use.
Can I use regular grounds?
Drip coffee grind is usually too coarse. Choose a fine moka-friendly grind, but avoid powder-fine espresso dust.
How do I know it is done?
The top chamber fills, the stream slows, and the sound shifts from bubbling to sputtering. That is your cue to lift it.
How often should I deep clean?
Deep clean every few months, or sooner if flavor changes. Keep the gasket and safety valve clear to prevent leaks.
Understand Your Moka Pot — The Key to Perfect Coffee
Your moka pot isn’t just a container; it’s a precise machine built for extracting flavor. It typically has three parts: the water reservoir at the bottom, the coffee basket in the middle, and the top chamber where the brewed coffee collects.
Choosing the right material matters. Aluminum models heat quickly but can stain and corrode over time, while stainless steel lasts longer and works on induction stoves. Familiarize yourself with your specific model to avoid leaks or improper seals.
Pick the Right Coffee — The Foundation of Good Espresso
Use freshly ground coffee that’s just slightly finer than drip coffee—think sugar granules, not powder. An overly fine grind can clog the filter, while too coarse won’t extract enough flavor.
Imagine grinding just enough for each brew—about 1 to 2 tablespoons of coffee depending on your moka pot size. Freshness boosts aroma—freshly ground beans release more oils and vibrant flavors into your brew.
Fill the Water Correctly — Avoid Overflow and Under-Extraction
Fill the bottom chamber with cold, clean water up to the safety valve level. Think of the safety valve as your safety net—don’t let water go past it, or pressure won’t build correctly.
For example, if your moka pot has a 6-cup capacity, fill it with about 150 ml of water. Overfilling can cause leaks, while underfilling might produce weak coffee.
Load the Coffee — Don’t Overpack or Tamp
Fill the filter basket with your ground coffee, leveling it off with a gentle shake or tap. No tamping—just a flat, even layer. Think of it as laying a foundation for flavor rather than packing it tight.
A common mistake is pressing down hard, which restricts water flow and causes bitter, over-extracted coffee. Just level it gently with a finger or a flat tool.
Assemble Your Moka Pot — Seal Tightly, Don’t Overdo It
Screw the top chamber onto the bottom firmly but without forcing it. A tight seal is essential for building pressure, but overtightening can damage the threads or make future disassembly tough.
Picture threading the parts until they feel snug—like tightening a jar lid—then give an extra quarter turn. That’s enough.
Brew on Medium Heat — Patience Is Key
Place the moka pot on your stovetop over medium heat. Too high, and you risk burning the coffee; too low, it takes forever. Aim for a steady, gentle heat that produces a slow, consistent bubbling.
It’s like a simmer for your coffee—listen for the gurgling sound, which means it’s brewing. Typically, it takes about 5-10 minutes, depending on the size and stove.
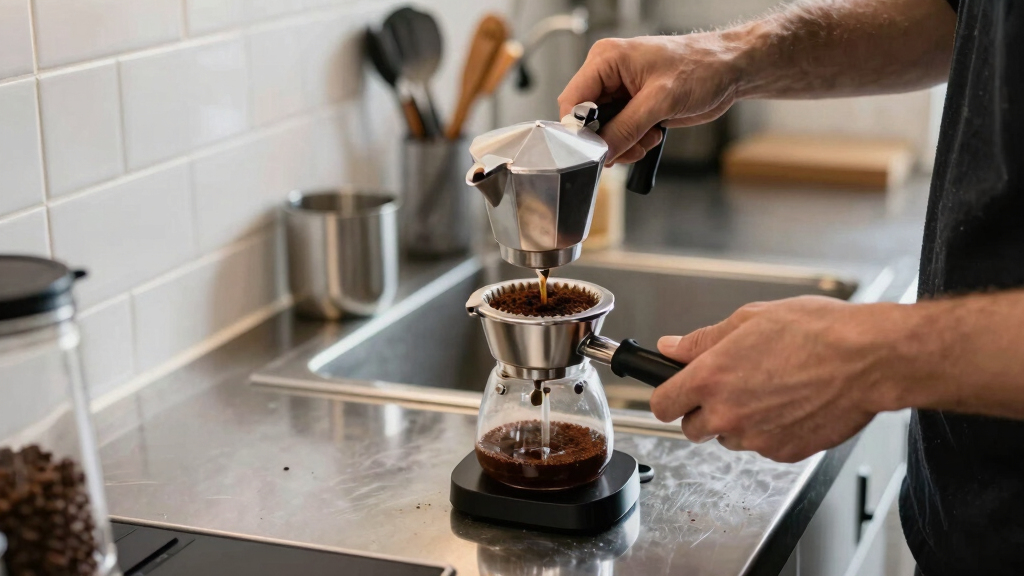
Know When to Remove — No Overbrewing Allowed
Once you hear a sputtering sound and see a steady flow of coffee into the top chamber, it’s time to lift the pot off heat. Don’t wait for all the bubbling to fade—this can lead to bitter flavors.
Imagine a gentle stream of coffee filling your cup—this is your cue to stop. If you leave it too long, the coffee can taste burnt or overly bitter.
Pour and Enjoy — Fresh, Rich, and Aromatic
Pour the coffee into your favorite mug immediately—hot, vibrant, and full of aroma. Feel the rich dark brew, smell the hints of caramel and toasted nuts, taste the bold, smooth flavor.
Remember, a moka pot produces a concentrated espresso-like shot—perfect for sipping or making a quick latte. Avoid letting it sit too long, which can cause bitterness.
Clean Your Moka Pot — Keep It in Top Shape
Rinse all parts with warm water after each use. For aluminum models, skip soap—soap can damage the surface and alter flavor. Use a soft brush to remove any residual grounds.
Every few months, soak the parts in warm vinegar or a mixture of water and baking soda to remove mineral buildup. Keep the gasket and safety valve clean to prevent leaks.
Frequently Asked Questions
How do I prevent the coffee from tasting bitter?
Use medium heat, avoid overfilling the water, and clean your moka pot regularly. Bitter flavors often come from over-extraction or burnt grounds—controlled heat and proper cleaning solve both.
Can I use regular coffee grounds, or do I need special grind?
You should use a fine grind, similar to espresso but not powder-fine. Regular drip coffee grind tends to be too coarse, resulting in weak brew, while too fine can clog the filter and cause overpressure.
How long does a typical brew take?
Usually 5 to 10 minutes, depending on your stove’s heat and the size of your moka pot. Patience ensures a slow, even extraction—rushing can lead to bitter, burned flavors.
Is it safe to leave the moka pot on the stove while I do other things?
Yes, but it’s best to stay nearby and monitor it. Overheating or forgetting can cause burning or overflowing, which might damage the pot or create a mess.
How often should I deep clean my moka pot?
Deep clean every few months or if you notice a change in flavor. Soak parts in vinegar or baking soda solution, and scrub gently, especially around the gasket and safety valve.
Conclusion
Mastering the stovetop espresso maker isn’t about magic—it’s about paying attention to small details and respecting the process. When you get each step right, you turn simple ingredients into a rich, memorable brew.
Next time you hear that gentle gurgle, you’ll know you’ve brewed something special—your own handcrafted espresso, off-grid and full of character. Keep practicing, and enjoy the ritual as much as the coffee itself.