TL;DR
Listen free for 30 days with Audible
Thousands of audiobooks and originals — cancel anytime.
Start your free trialAs an affiliate, we earn on qualifying purchases.
You can grate cheese without an electric grater using simple tools like a box grater, microplane, or vegetable peeler. Freezing soft cheese makes it easier, and proper technique prevents injuries. Patience and safety are key.
Chill or freeze cheese before grating soft varieties for cleaner, easier results.
A box grater, microplane, or vegetable peeler each serve different needs—choose based on cheese type and desired texture.
Safety is paramount—use stable surfaces, keep fingers clear, and consider gloves if needed.
Patience and technique beat speed—manual grating requires care, but yields control and flavor.
Experiment with tools and cheese types to develop a simple, reliable routine for off-grid or manual kitchens.
Choose the Right Tool for Perfectly Grated Cheese
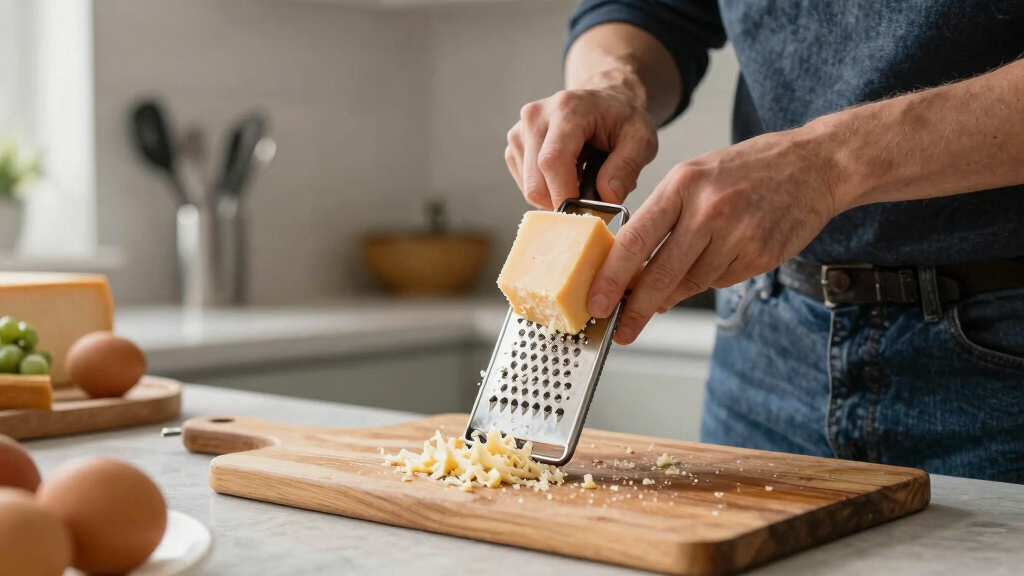
Manual tools can turn a block of cheese into fluffy shreds or tiny flakes, depending on your needs. The classic box grater remains the most versatile option. It offers several sides: coarse, fine, zesting, and slicing. For soft cheeses like mozzarella or cream cheese, a microplane can produce delicate shreds or zest. Vegetable peelers work surprisingly well for soft cheeses or creating thin flakes, especially if you’re topping a salad or pasta. A handheld rotary grater is great for small batches and offers control, especially if you’re grating cheese frequently. Lastly, a sharp knife and cutting board can serve as a manual backup—finely chopping can substitute when other tools aren’t available. Each tool has tradeoffs: while a box grater is versatile, it can be bulky and take up storage space; microplanes produce very fine shreds but are limited to small quantities, which matters when preparing large meals. Rotary graters are ergonomic but less effective for large batches, so consider your typical needs and storage space when choosing your tool. Understanding these tradeoffs helps you select a tool that balances convenience, safety, and the desired final texture.As an affiliate, we earn on qualifying purchases.
How to Prepare Cheese for Easier Grating
Soft cheeses such as mozzarella or Brie tend to be sticky and tear easily, which can ruin the texture of your final dish and make the grating process frustrating. The secret is temperature control: chilling or freezing the cheese solidifies its structure, making it less sticky and easier to handle. Freezing for 15 minutes turns soft, gooey cheese into a firm, manageable block—think of it as turning a melting ice cube into a solid, which allows for cleaner, more uniform shreds. This step is crucial because soft cheeses contain high moisture content, making them prone to clumping and tearing when grated. If not properly prepared, they can clog your grater or produce uneven shreds, affecting the presentation and texture of your dish. For hard cheeses like Parmesan, no prep is needed beyond cutting into manageable chunks; their dry texture makes them naturally easier to grate. When grating, keep your cheese cold—warm cheese becomes sticky and clogs your grater, leading to uneven shreds and potential slips. Using a damp cloth or non-slip mat under your tool prevents slipping, which is crucial when applying pressure. Applying even, steady pressure is a tradeoff: while it might take longer, it reduces the risk of tearing the cheese or injuring yourself, especially with softer varieties. The key is understanding that temperature manipulation directly influences the quality, safety, and efficiency of your grating process, making your effort more effective and less frustrating.As an affiliate, we earn on qualifying purchases.
Step-by-Step: How to Hand-Grate Cheese Like a Pro
- Chill cheese in the fridge or freezer for 15-30 minutes. This step is vital for soft cheeses, transforming their texture from sticky to firm, which directly impacts the quality of your shreds and reduces mess. Proper preparation ensures the cheese is firm enough to hold its shape, reducing tearing and making the grating process smoother. It also minimizes the risk of slipping or injury, especially when applying pressure. Rushing this step can cause soft cheese to become gooey and difficult to handle, leading to uneven shreds and frustration. If you’re in a hurry, even a brief freeze can make a noticeable difference.
- Choose your tool: box grater, microplane, or peeler. Think about your desired texture—coarse or fine—and the quantity needed. Selecting the right tool affects not just the final appearance but also the ease and safety of grating. For example, using a microplane for soft cheeses yields delicate, fluffy shreds ideal for garnishing, while a box grater is better for larger quantities needed in recipes. Understanding these nuances helps you match your technique to your culinary goal, ensuring efficiency and quality.
- Place the cheese on a stable, damp surface to prevent slipping. Using a damp cloth or non-slip mat ensures safety, especially when applying pressure. Stability is crucial because slipping can cause accidental cuts or injuries. A secure surface allows you to exert even pressure without losing control, which is particularly important with soft or sticky cheeses. This step might seem minor but significantly reduces the risk of accidents and improves your control, resulting in cleaner, more uniform shreds. When working quickly or with large quantities, maintaining stability becomes even more essential—think of it as setting a foundation for a safe and efficient grating process.
- Hold the cheese firmly, keeping your fingers away from the sharp edges. For soft cheeses, consider using a claw grip—curl your fingers inward to protect your fingertips while holding the cheese securely. Proper grip technique minimizes the risk of accidental cuts. Curling your fingers inward not only protects your fingertips but also improves control, especially when applying steady pressure. This technique is vital because it keeps your hand away from the sharp, often aggressive edges of the grater, reducing injury risk. Developing good grip habits and awareness of your hand positioning are essential for safe, effective grating, especially during longer sessions or when working with hard cheeses that require more force.
- Apply even pressure and push the cheese against the grater or peel, moving steadily. This consistent motion ensures uniform shreds and reduces tearing or slipping. Applying uneven pressure can cause the cheese to tear or clog the tool, leading to mess and potential injury. Steady, deliberate movement allows the cheese to be shredded smoothly and uniformly, which enhances the final texture and appearance of your dish. Developing a rhythm and maintaining consistent pressure also minimizes fatigue and keeps the process safe. Remember, patience and control are more important than speed—rushing can compromise safety and quality.
- For soft cheeses, work slowly and cautiously—rushing can cause tearing and mess, while patience yields cleaner results. Taking your time allows the cheese to be shredded cleanly without tearing or clogging your tool. Rushing often leads to uneven shreds, which can affect the texture and presentation of your dish, especially in delicate recipes. Slow, deliberate movements also help you maintain control, reducing the risk of slips or injuries. Think of this as a craft—precision over speed results in a better end product and a safer experience.
- Periodically rinse the grater or tool to clear cheese buildup, maintaining efficiency and safety throughout the process. Regular cleaning prevents cheese from accumulating and clogging the tool, which can cause uneven shredding and increase the risk of slips or accidental cuts. It also reduces bacterial growth, especially with soft cheeses, ensuring food safety. Taking a moment to clean your tool between batches minimizes frustration and keeps your workflow smooth. This simple step might seem minor but has a significant impact on your overall safety, hygiene, and the quality of your grated cheese. Think of it as maintaining your equipment—good maintenance leads to better results and a safer kitchen environment.
As an affiliate, we earn on qualifying purchases.
Compare Manual Graters and Tools at a Glance
| Tool | Best For | Pros | Cons |
|---|---|---|---|
| Box Grater | All cheese types, large batches | Versatile, multiple grating sizes, sturdy | Bulkier, takes up storage space |
| Microplane | Fine zesting, soft cheeses | Very fine, precise, easy to clean | Limited to small quantities |
| Vegetable Peeler | Soft cheeses, flakes | Simple, inexpensive, quick | Less uniform, less control |
| Rotary Grater | Small batches, soft cheeses | Ergonomic, safe, controlled | Less effective for large quantities |
As an affiliate, we earn on qualifying purchases.
Safety Tips to Avoid Cuts and Injuries
Manual cheese grating involves sharp edges—be cautious. Always keep your fingers away from the grater’s sharp surfaces. Use a damp cloth or non-slip mat underneath your tool for stability. When working with small pieces, hold the cheese with a claw grip—curl your fingers inward to protect your fingertips. If you’re grating a lot, take breaks to avoid fatigue, which can lead to slips. Wearing cut-resistant gloves can add a layer of safety, especially for beginners. Remember, patience and focus are your best safety tools. Rushing increases the risk of accidental cuts, and fatigue can cause slips that lead to injuries. Think of safety as an extension of your technique—taking the time to set up a stable workspace and handling tools properly prevents common accidents and keeps your fingers intact.How to Handle Different Types of Cheese
Hard cheeses like Parmesan or Pecorino grate easily and produce fine, fluffy shreds. Soft cheeses like mozzarella or cream cheese need extra prep—chill or freeze for better control. Cheeses with high moisture content can be sticky; freezing helps reduce mess and makes grating smoother. Crumbly cheeses, such as feta or aged cheddar, benefit from breaking into smaller pieces before grating—they prevent clogging and uneven shreds. For delicate garnishing, microplanes create fine, fluffy shreds that look elegant and melt quickly. Larger flakes or chunks, achieved with a coarse grater or peeler, add texture and visual interest. Adjust your technique based on cheese type: for example, pressing harder for hard cheeses, or working gently for soft, delicate varieties. Understanding these nuances allows you to choose the right method for each cheese, ensuring optimal texture and presentation.Final Tips for Mastering Manual Cheese Grating
Practice patience—manual grating isn’t instant. Keep tools sharp and clean for smooth operation. Experiment with different cheeses and tools to find your favorite combo. When grating soft cheeses, remember: cold is your ally. Don’t rush—rushing leads to slips and uneven shreds. For larger recipes, break down the process into smaller batches. And always, prioritize safety—your fingers will thank you. Over time, manual grating becomes a satisfying part of your kitchen routine, connecting you to the craft of simple, honest food prep. Think of it as a mindful ritual—each turn of the grater a small act of culinary mindfulness that enhances your appreciation for the ingredients and the process.Frequently Asked Questions
Can I grate soft cheese without it sticking or tearing?
Yes. Freezing the cheese for 15-30 minutes firms it up, making grating smoother and cleaner. Using a microplane also helps produce fine, uniform shreds without tearing.What’s the safest way to grate cheese without risking cuts?
Always keep your fingers away from the sharp edges. Use a claw grip or gloves, and secure your grater on a damp cloth or non-slip mat. Take your time—rushing increases risk.Is it better to use a knife or food processor for grating cheese?
A sharp knife can finely chop cheese, but it’s more time-consuming and less uniform. A manual food processor with a grating attachment works well if you prefer a quicker, consistent result—just remember, it’s not electric, so turn the handle yourself.Can I grate cheese directly onto hot dishes?
Absolutely. Grated cheese melts quickly and evenly, especially if it’s cold or frozen beforehand. Just work swiftly to avoid clumping or sticking.What’s the biggest mistake to avoid when grating cheese by hand?
Rushing or applying uneven pressure. It increases the chance of slips, tears, and injuries. Take your time, and focus on steady, controlled movements.Conclusion
Manual cheese grating isn’t just a fallback — it’s a skill that reconnects you with your food. With patience, the right tools, and a little practice, you’ll turn blocks into fluffy shreds in no time. Plus, there’s a satisfying rhythm to doing it by hand—like a tiny, mindful ritual in your kitchen.Back to school Picks
back to school
As an affiliate, we earn on qualifying purchases.