
TL;DR
Listen free for 30 days with Audible
Thousands of audiobooks and originals — cancel anytime.
Start your free trialAs an affiliate, we earn on qualifying purchases.
Making pesto with a mortar and pestle preserves aromatic oils and enhances flavor. It’s a simple, satisfying process that yields a more vibrant and textured sauce than blending.
Crushing herbs with a mortar and pestle releases more aromatic oils, making your pesto more flavorful.
Gradually adding ingredients and controlling pressure shapes the texture and enhances taste.
Choosing high-quality, fresh ingredients is key—toast nuts and use aged cheese for depth.
Adjust oil carefully to get your preferred thickness—thicker for spreading, thinner for drizzling.
Experiment with herbs and nuts for unique variations, but always grind gently to preserve flavor.
How to Make Pesto in a Mortar and Pestle
Grinding pesto by hand preserves fragrant oils, creates a vibrant rustic texture, and gives you precise control over every ingredient. The process is tactile, patient, and deeply rewarding.
Start with flavor that lasts
Freshness is the foundation. Young herbs, lightly toasted nuts, aged cheese, and cold-pressed oil produce a pesto with greater aroma, depth, and balance.
Young basil
Choose bright green, tender leaves with a sweet fragrance. Avoid bruised, wilted, or brown leaves that may taste dull or bitter.
Fresh garlic
One small peeled clove is often enough. Salt helps turn it into a mellow, aromatic paste before the basil enters the mortar.
Pine nuts
Toast lightly in a dry skillet for about two minutes, stopping when golden and fragrant. Cool before grinding.
Parmigiano or Pecorino
Finely grate an aged cheese for crystalline saltiness and savory depth. Pecorino is sharper; Parmigiano is rounder.
Extra virgin olive oil
Use a flavorful cold-pressed oil. Add it slowly so it emulsifies instead of flooding the carefully ground mixture.
Coarse salt
A small pinch seasons the sauce and provides friction, helping garlic and basil surrender their aromatic oils.
Layer ingredients. Control pressure.
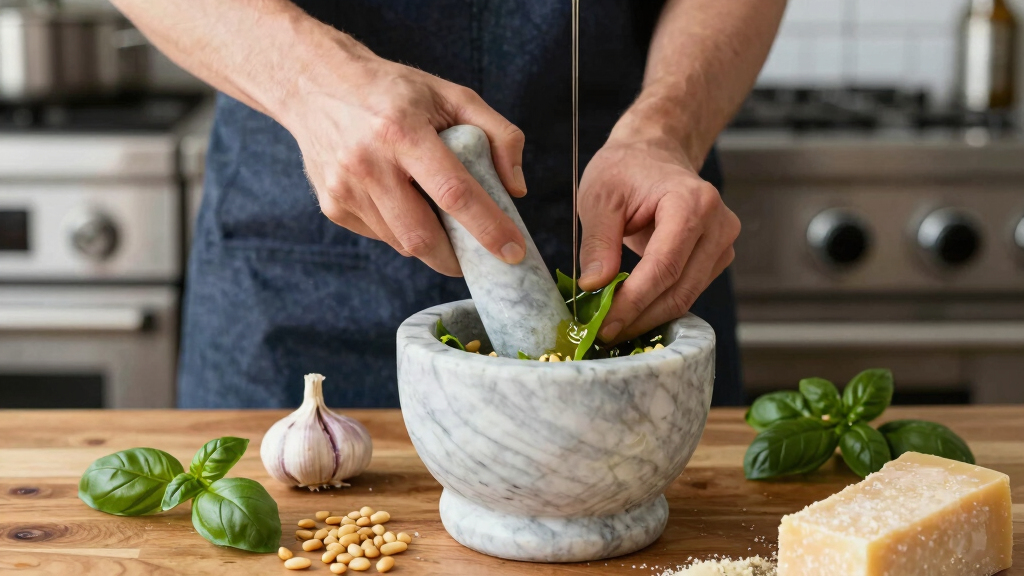
Steady the mortar with one hand and move the pestle in firm circular strokes with the other. Add each ingredient only after the previous layer has reached the right texture.
Garlic + salt
Grind into a smooth paste to soften the garlic’s raw edge and establish the base.
Add basil gradually
Bruise a small handful at a time until the leaves become a fragrant green paste.
Crush toasted nuts
Work them into the basil while preserving a few tiny pieces for texture.
Fold in cheese
Mix finely grated cheese through the paste until evenly distributed.
Drizzle the oil
Add slowly while grinding until the pesto becomes cohesive, glossy, and spoonable.
The pressure sweet spot
Use enough force to bruise and crush, but avoid aggressive pounding. Circular friction releases volatile compounds gradually and keeps the pesto lively.
Why pesto tastes better by hand
A mortar gives continuous sensory feedback. You can smell the aroma, see the texture, and stop grinding before the ingredients become overheated or homogenized.
| Quality | Mortar + pestle | Food processor | Blender |
|---|---|---|---|
| Aromatic oil release | ✓High, gradual release | ~Moderate | ✗Rapid processing |
| Texture control | ✓Precise and tactile | ~Pulse dependent | ✗Often very smooth |
| Heat generation | ✓Very low | ~Low to moderate | ✗Higher at speed |
| Speed | ✗Slow and deliberate | ✓Fast | ✓Very fast |
| Traditional character | ✓Rustic and nuanced | ~More uniform | ✗Homogenized |
Aroma is the hand-ground advantage
The supplied research estimate describes hand-ground pesto as approximately 30% more aromatic than blender-made pesto. Treat the figure as a directional comparison: freshness, ingredient quality, equipment, and technique all influence the result.
Adjust oil for the dish
Add olive oil a little at a time, fully incorporating each drizzle. Less oil preserves intensity and body; more oil creates flow and softens the herb-and-nut concentration.
Thick spread
Dense and cohesive for crostini, sandwiches, and savory fillings.
Classic pesto
Textured and spoonable for pasta, gnocchi, soups, and grain bowls.
Fluid drizzle
Loose and glossy for grilled vegetables, fish, eggs, and salads.
Keep the method. Change the character.
Walnut + basil
Use toasted walnuts for a richer, slightly tannic pesto with a deep nutty finish.
Arugula + almond
Pair peppery leaves with mild toasted almonds for a bright sauce with gentle heat.
Kale + cashew
Remove tough stems, use tender leaves, and grind carefully to tame bitterness.
Herb + nutritional yeast
Replace cheese with nutritional yeast or vegan cheese for savory umami depth.
Perfect pesto, every time
Keep ingredients cool
Let toasted nuts cool completely and avoid leaving basil in direct heat before grinding.
Add basil in small batches
A crowded mortar encourages pounding. Smaller additions make circular crushing easier.
Stop before it becomes smooth
Visible flecks create rustic texture and let individual flavors remain distinct.
Protect the surface
Press pesto into an airtight container and cover it with a thin film of olive oil.
Refrigerate briefly
Enjoy within three to five days for the freshest aroma, color, and flavor.
Freeze small portions
Use an ice cube tray to create convenient portions, then transfer them to an airtight container.
Choose the Best Ingredients for Flavor That Lasts
Fresh herbs like basil are the backbone of good pesto. Use young, fragrant leaves—think bright green and tender, not wilted or brown. The quality of your herbs directly impacts the final flavor; older or bruised leaves can introduce bitterness or dullness. Toast pine nuts lightly in a dry skillet until golden and fragrant, about 2 minutes, to enhance their nutty aroma and break down their cell walls, making their oils more accessible. For cheese, opt for aged Parmigiano-Reggiano or Pecorino Romano—these cheeses have complex flavors and crystalline structures that add depth and saltiness. Use good-quality extra virgin olive oil, ideally cold-pressed, for richness. Remember, your ingredients are the foundation of your pesto’s flavor profile, so choose wisely and fresh. The better the ingredients, the more nuanced and vibrant your pesto will be, and the more forgiving the process becomes if minor mistakes happen.
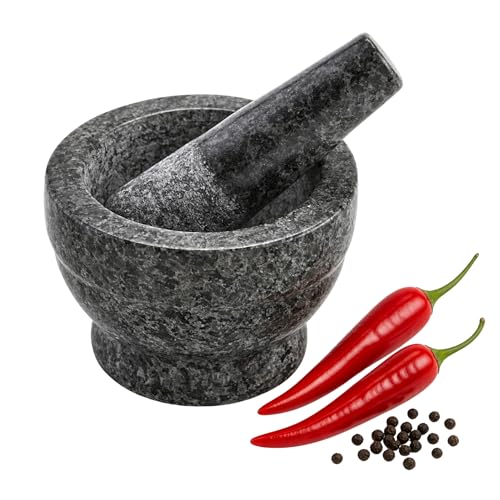
IMUSA USA Small Polished Mortar and Pestle, 3.75”, Granite
- Compact Size: 3.75-inch diameter for small kitchens
- Durable Granite Construction: Long-lasting and reliable for kitchen use
- Rough Interior Surface: Effective grinding and flavor release
As an affiliate, we earn on qualifying purchases.
As an affiliate, we earn on qualifying purchases.
Master the Technique: How to Grind in a Mortar and Pestle
Start by crushing garlic and a pinch of salt into a paste. This initial step is crucial because it helps mellow the raw sharpness of the garlic and creates a flavorful base for the pesto. The salt acts as an abrasive, aiding in breaking down the garlic’s cell walls and releasing more of its essential oils, which enhances the overall aroma and depth of flavor. Use one hand to steady the mortar, applying gentle but consistent pressure, while the other hand uses the pestle in a circular, grinding motion. This method ensures an even breakdown of herbs and nuts, allowing their volatile oils to be released gradually. When adding basil leaves, do so gradually, crushing and bruising them to maximize their aromatic oils without tearing them apart too aggressively, which could lead to bitterness or loss of delicate flavors. Incorporate toasted pine nuts, continuing to grind until the mixture becomes fragrant and slightly coarse—each layer of grinding develops the complexity of the pesto. Mix in grated cheese, then slowly drizzle olive oil while grinding to emulsify and bind the ingredients. The aim: a textured, vibrant paste with visible bits of herbs and nuts, not a smooth puree. This process requires control and patience because rushing can crush flavors or produce a muddy, overly processed texture. Proper technique preserves the integrity of each ingredient’s aroma and texture, resulting in a more flavorful, authentic pesto.

Priority Chef Heavy Duty Large 1.5 Cup Mortar and Pestle Set, 100% Natural Granite, 5.5 Inch Diameter Bowl, 6.2 Inch Pestle, Non-Slip Base, Stone Grinder for Guacamole Salsa Pesto Herbs Spices, Black
- Large Capacity: 1.5 cup, 5.5-inch diameter bowl
- Heavy Duty Construction: Solid granite for serious grinding
- Versatile Use: Make guacamole, salsa, pesto, and more
As an affiliate, we earn on qualifying purchases.
As an affiliate, we earn on qualifying purchases.
Why Your Pesto Will Taste Better by Hand
Using a mortar and pestle allows you to control the pressure and grinding speed, which directly influences how effectively flavors are extracted from your ingredients. This gentle manipulation is essential because it preserves the delicate volatile aromatic compounds found in herbs and nuts—these compounds are responsible for the vibrant aroma and nuanced flavor profile of authentic pesto. When you crush ingredients slowly and methodically, you avoid over-processing, which can break down essential oils and diminish aroma. In contrast, a high-speed blender or food processor rapidly grinds everything into a smooth paste, often stripping away these delicate oils and resulting in a flatter, less aromatic flavor. The mortar and pestle’s manual process mimics traditional methods, enabling you to sense the texture and aroma at each stage, giving you precise control over the final taste. Think of it like squeezing fresh herbs by hand versus chopping them coarsely—squeezing releases more essential oils, intensifying aroma and flavor. This careful, tactile approach ensures your pesto retains its complexity and depth, making it richer and more satisfying than a homogenized blend. The tradeoff is time and effort, but the reward is a more vibrant, aromatic, and authentic sauce that elevates any dish.
handcrafted marble mortar and pestle
As an affiliate, we earn on qualifying purchases.
As an affiliate, we earn on qualifying purchases.
Adjusting Texture and Consistency for Perfect Pesto
Traditional pesto is somewhat chunky, with bits of basil and nuts visible, which adds to its rustic charm and flavor complexity. Adjusting the texture involves balancing the amount of olive oil, which acts as a binder and flavor enhancer. For a thicker spread—ideal for spreading on bread or crostini—use less oil and grind longer to develop a more cohesive, dense paste. For a more fluid, sauce-like consistency—perfect for tossing with pasta or drizzling over grilled vegetables—drizzle in more olive oil gradually while grinding, ensuring each addition is fully incorporated before adding more. The amount of olive oil you add influences not only the texture but also the flavor; more oil can mellow the intensity of herbs and nuts, creating a smoother, more uniform sauce, while less oil preserves a chunkier, more textured bite. Experimenting with the amount of oil and grinding time allows you to customize the pesto to suit your dish and preference, turning a simple sauce into a versatile ingredient that can adapt to various culinary needs. Recognizing how texture impacts flavor perception helps you craft a pesto tailored to your taste and application, whether it’s a rustic spread or a silky sauce.

Samhita Acacia Wood Mortar and Pestle for Garlic Pepper Herb Crusher Kitchen Utensils Birthday Housewarming Gift. Mortar- 4" x 3" Pestle- 5.5"
- Ideal for Grinding Spices: Perfect for spices, garlic, and herbs
- Traditional Design: Suitable for various mashing tasks
- Versatile Kitchen Tool: Crushes garlic, ginger, vanilla, and pepper
As an affiliate, we earn on qualifying purchases.
As an affiliate, we earn on qualifying purchases.
Modern Twists: Variations and How to Make Them Work
While classic basil pesto is timeless, experimenting with other nuts like walnuts or almonds can introduce new layers of flavor and texture. Toasted walnuts, for example, add an earthier, richer profile that can complement or even enhance the original flavor. Swapping basil for arugula or kale introduces different flavor profiles—peppery arugula or slightly bitter kale—creating a more complex or unique pesto that can stand out in various dishes. Vegan options often replace cheese with nutritional yeast or vegan cheese, which can slightly alter the texture but still provide umami richness. When making these variations, the key is to remember that the mortar and pestle’s gentle crushing preserves delicate flavors, so select high-quality ingredients and grind carefully. For instance, blending toasted walnuts with arugula results in a pesto with a spicy, nutty punch—perfect for drizzling over roasted vegetables or pasta. Each variation’s success hinges on understanding how the specific ingredients’ flavor and texture properties respond to grinding, and adjusting your technique accordingly. This approach allows you to craft personalized, flavorful pestos that respect the traditional method while exploring new culinary territory.
Practical Tips for Perfect Pesto Every Time
- Use fresh, fragrant herbs and toasted nuts to maximize flavor and aroma. For example, choose basil that smells sweet and fresh, and toast nuts until fragrant and golden, not burnt.
- Gradually add basil to avoid crushing too hard at once, which helps preserve delicate oils and prevents bitterness.
- Crush garlic and salt first for a flavorful base—this step ensures a uniform, mellow garlic flavor that doesn’t overpower the pesto.
- Apply steady, firm pressure—don’t rush. Consistent grinding allows for even release of flavors and prevents over-processing.
- Adjust olive oil for desired consistency, adding slowly and tasting as you go—this ensures the pesto is perfectly textured for your intended use.
Frequently Asked Questions
Can I use a blender or food processor instead of a mortar and pestle?
Yes, but the flavor and texture will differ. Blenders produce a smoother, less aromatic pesto because they don’t crush ingredients as gently. The mortar and pestle preserve volatile oils, giving your pesto a richer aroma.How do I keep pesto from turning brown?
Cover the pesto with a thin layer of olive oil or add a squeeze of lemon juice. Store it in an airtight container in the fridge and consume within 3-5 days for the best flavor and color.Can I make pesto ahead of time?
Absolutely. Prepare it and store in a jar topped with olive oil. Keep it refrigerated and use within a few days. Freezing in small portions or ice cube trays also works well for longer storage.What are good alternatives to basil in pesto?
You can swap basil for arugula, spinach, or kale. Nuts can be replaced with walnuts, almonds, or cashews. For vegan versions, skip cheese and add nutritional yeast or vegan cheese.What’s the best way to serve homemade pesto?
Toss it hot pasta, spread it on crusty bread, or swirl it into soups. Its texture and flavor shine best when fresh, but a little patience in storage keeps it vibrant for days.Conclusion
Taking the time to make pesto with a mortar and pestle isn’t just about tradition; it’s about flavor. The hands-on process unlocks aromas and textures that a blender simply can’t match. Next time you want a sauce that sings, grab your mortar and pestle. Your taste buds will thank you for it.Baby shower & registry season Picks
baby registry must-haves
As an affiliate, we earn on qualifying purchases.