
TL;DR

Get kitchen gear delivered free — and shop member deals
- Fast, free delivery on millions of items
- Access to Prime Big Deal Days deals on October 6–7
- Prime Video, Amazon Music and more included
Solar oven recipes for beginners focus on slow, low-temp dishes like baked potatoes, rice, and stews. Use dark, shallow cookware, and plan for longer cooking times with good sunlight. Safety and patience are key to successful solar cooking.
Choose forgiving recipes like baked potatoes, rice, and vegetable stews to build confidence.
Dark, shallow, lightweight cookware enhances heat absorption and even cooking.
Position your solar cooker toward the sun, adjusting every 20–30 minutes for best results.
Use a thermometer to check food safety, especially for meats—aim for safe internal temperatures.
Expect longer cooking times—plan your meals with patience and flexibility.
Solar Oven Recipes for Beginners
Turn direct sunlight into a gentle, persistent cooking heat. Start with forgiving foods, dark covered cookware and a flexible schedule—and learn to make satisfying off-grid meals without fuel or electricity.
Three recipes that forgive the weather
Begin with dishes that tolerate temperature swings and extra time. They teach heat management without demanding split-second timing.
Sweet potatoes
2–3 hoursScrub and pierce, then place in a dark covered pan. Start early and cook until a fork slides in easily. Wrapping is optional if the pan traps heat well.
Vegetable stew
2–4 hoursCut vegetables into small, even pieces. Add beans, tomatoes and seasoning, but reduce the liquid because a covered solar pot retains moisture.
White rice
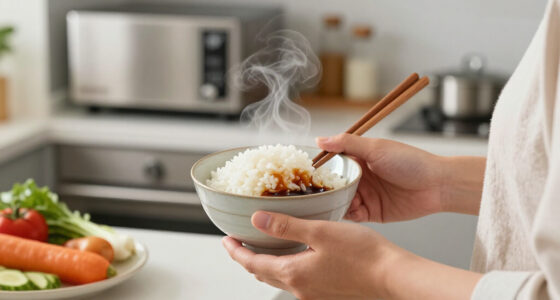
2–3 hoursCombine one part rice with two parts water in a tightly covered dark pot. Warm water can shorten the process. Resist opening the lid.
| Recipe | Beginner fit | Preparation move | Solar advantage | Watch for |
|---|---|---|---|---|
| Sweet potatoes | ✓ Excellent | Pierce; use a covered dark pan | Hard to scorch | Large potatoes need extra time |
| Vegetable stew | ✓ Excellent | Chop small; reduce liquid | Steady heat builds flavor | Dense vegetables cook slowly |
| White rice | ✓ Strong | Use 1:2 rice-to-water | Covered pot retains steam | Avoid lifting the lid |
| Quick bread | ~ Intermediate | Choose a shallow dark pan | Box ovens can bake evenly | Needs reliable baking heat |
| Steak for searing | ✗ Poor fit | Use another heat source | None for high-heat searing | Solar heat is too gentle |
Build heat, then protect it
A solar oven works by collecting radiant energy, converting it to heat and preventing that heat from escaping.
Find clear sun
Choose a bright, wind-sheltered spot free from moving shadows.
Preheat
Warm the empty cooker in strong sunlight for about 30 minutes.
Load shallow
Use dark, thin cookware and spread food in an even layer.
Track the sun
Check alignment every 20–30 minutes or follow maker guidance.
Verify temperature
Use a thermometer before serving, especially for animal proteins.
Do not keep peeking. Every opening releases accumulated heat and extends cooking time. Use a transparent lid or oven thermometer when possible.
Small choices make a hotter oven
Cookware color, shape and mass can change performance as much as the recipe itself.
Dark and matte
Black or dark cookware absorbs radiant energy more effectively than shiny metal.
Thin and lightweight
Less pot mass means more collected energy is available to heat the food.
Shallow and covered
A broad, shallow layer heats evenly; a tight lid traps both heat and moisture.
Small and uniform
Evenly cut ingredients finish together and reduce the chance of cool centers.
Warm is not the same as safely cooked
Slow heat can conceal an undercooked center. Trust a food thermometer, not appearance, texture or elapsed time.
- Keep perishables out of the 40–140°F danger zone as much as possible.
- Never partially cook meat and leave it to finish later.
- If clouds stall cooking, finish promptly with conventional heat.
- Use only cookware and plastics rated for cooking temperatures.
- Keep reflectors stable and away from children, pets and strong wind.
A special warning about kidney beans
Dried kidney beans require a vigorous boil for at least 10 minutes to destroy naturally occurring toxins. A low-temperature solar oven may not provide that boil reliably. Pre-boil them conventionally or use properly canned beans.
Cook within the sunlight you actually have
Clear, direct sun provides the most stable heat. Clouds, wind, low winter sun and late starts all lengthen the process. Begin before midday so peak sunlight arrives while the food is cooking.
Danger zone begins
Danger zone ends
Typical low range
Typical high range
Solar ovens do well
- Potatoes and root vegetables
- Rice and covered grains
- Stews, chili and beans
- Baked apples and fruit crisps
- Corn on the cob
- Quick breads and muffins
- Covered egg dishes
- No-knead bread in hotter ovens
Choose another method
- High-heat frying
- Fast boiling on demand
- Steakhouse-style searing
- Recipes with precise timing
- Unmonitored meat cooking
- Food during unstable weather
- Raw kidney beans without pre-boiling
- Any meal that cannot wait
Your first successful solar meal
Choose a forgiving dish, preheat the cooker, use a dark shallow covered pan and start before midday. Reposition periodically, avoid lifting the lid and verify safe temperatures before serving. Patience is not a workaround—it is the core technique.
How to Pick Your First Solar Recipe (And Why It Matters)
Choosing the right first recipe is about forgiving, slow-cooking dishes that tolerate temperature fluctuations. Think baked potatoes, rice, or vegetable stews. These are less likely to scorch or dry out, giving you confidence with your new solar setup.
Why does this matter? Because solar cooking inherently involves variability — the sun isn’t always at its peak, and weather conditions change. Selecting forgiving recipes minimizes frustration and helps you learn how your particular setup responds to these fluctuations. It’s about understanding the tradeoff: these dishes cook slowly but reliably, allowing you to focus on mastering your equipment without the stress of high-stakes timing or delicate ingredients.
For example, a baked sweet potato in a dark, shallow pan can be ready in 1.5 to 3 hours on a bright, clear day. The trick? Use a well-insulated, dark-colored pot that absorbs sunlight efficiently, and don’t open the lid too often — each peek releases heat, prolonging cooking times. Recognizing these tradeoffs helps you optimize your process over time, leading to more consistent results and a better understanding of how to adapt to weather changes.
As an affiliate, we earn on qualifying purchases.
3 Foolproof Solar Recipes Every Beginner Should Try
Here are three classic, easy solar recipes that prove slow, steady heat works just fine:
| Recipe | Approximate Time | Key Tips |
|---|---|---|
| Baked sweet potatoes | 2–3 hours | Pierce, wrap in foil or cover, use a dark pan, and start early in the day. |
| Vegetable stew | 2–4 hours | Chop ingredients small, reduce liquids, and preheat the cooker for even cooking. |
| White rice | 2–3 hours | Use a 1:2 rice-to-water ratio, cover tightly, and avoid opening during cooking. |
These dishes highlight how patience and simple adjustments—like using dark, shallow pans—make solar cooking easy and reliable. They also teach you the importance of timing and preparation, since slow cooking is sensitive to weather and equipment choices. For instance, a small change in the pot’s darkness or the angle of your reflector can significantly affect cooking speed. Understanding these tradeoffs enables you to troubleshoot and refine your technique, ultimately making solar cooking more predictable and enjoyable.
As an affiliate, we earn on qualifying purchases.
How to Prepare Your Solar Cooker for Maximum Success
Getting your cooker ready is about optimizing sunlight and heat retention. Use dark, lightweight, and thin cookware—these absorb solar energy better than shiny or thick pots. Cover your dishes with lids or dark covers to trap heat and moisture, which speeds cooking.
Position your cooker toward the sun, adjusting every 20–30 minutes if needed. Preheating the cooker by leaving it in strong sunlight for 30 minutes before adding ingredients can significantly reduce cooking times and improve efficiency. Keep the cooker in a bright, shadow-free spot, away from wind and shadows from trees or buildings.
For example, on a bright summer day, a well-prepared box cooker can reach 250°F — hot enough to bake bread or stew. Regular repositioning ensures you catch maximum sunlight, especially during morning or late afternoon when the sun’s angle shifts. This process involves balancing exposure and stability — too much movement can cause heat loss, but consistent adjustment maximizes heat gain. Recognizing these tradeoffs helps you develop a routine that yields the best possible results with your specific setup.
As an affiliate, we earn on qualifying purchases.
Safety Tips to Keep in Mind When Solar Cooking
Solar cooking is safe as long as you follow a few simple rules. Use a food thermometer to check internal temperatures—especially for meats. Poultry needs to reach 165°F, and ground meats 160°F, just like in traditional cooking. This ensures pathogens are killed, which is critical because slow cooking can sometimes mask undercooked centers if not monitored.
Avoid partial cooking of meats or leaving perishable foods out for too long, as bacteria can multiply at unsafe temperatures. Keep raw or cooked foods out of the ‘danger zone’ — 40–140°F — to prevent bacteria growth. Using insulated containers for hot foods and promptly refrigerating leftovers further reduces risks. Never leave your cooker unattended in a place where children or pets can tamper with it or where wind might tip over reflective panels, which could cause burns or injuries.
For example, always check your stew’s temperature before serving, and if clouds roll in or the sun dips, finish cooking on a stove or fire to ensure safety. The key is understanding that slow heat doesn’t eliminate bacteria, so proper handling and monitoring are essential to safe solar cooking.
dark shallow cookware for solar cooking
As an affiliate, we earn on qualifying purchases.
As an affiliate, we earn on qualifying purchases.
Weather and Timing: Making the Most of Sunny Days
Solar cooking depends heavily on weather. Clear, direct sunlight is your best friend because it provides consistent, intense heat necessary for efficient cooking. Cloudy, windy, or cold days slow down or halt cooking altogether, which can be frustrating if you’re unprepared. A bright winter sun can still cook, but shorter days and lower sun angles mean longer times for the same dishes.
Planning your cooking schedule around the weather forecast is crucial. Starting early in the morning allows you to maximize the available sunlight, and if clouds appear, be ready to switch to conventional methods. Use a timer and a thermometer to track progress, ensuring your food reaches safe temperatures even if cooking takes longer than expected. Recognizing the tradeoff: relying solely on sunlight means accepting variability — sometimes you’ll get quick results, other times longer waits — but flexibility and preparation make it manageable.
For instance, a sunny summer afternoon might cook rice in 2 hours, but on a partly cloudy day, it could take 3 hours or more. Adjusting your expectations and being adaptable are key to successful solar cooking in variable weather conditions.
What You Can and Can’t Cook in a Solar Oven
Solar ovens excel at slow, gentle dishes because they provide a steady, low-temperature environment that mimics a slow cooker or traditional oven. You can bake bread, roast vegetables, simmer stews, and cook rice or beans. These methods take advantage of the consistent heat and moisture retention, which develop flavors and tenderize ingredients over time.
However, don’t expect to fry, sear, or rapidly boil foods—these techniques require much higher temperatures or quick heat transfer that solar ovens simply can’t provide. For example, frying eggs or searing steak involves high heat and short cooking times, which are incompatible with the slow, gentle heat of solar ovens. Attempting such techniques can result in burned or undercooked food and can damage your equipment.
Understanding this tradeoff is essential: solar cookers are more like an oven or slow cooker than a stovetop. They are ideal for casseroles, baked goods, and braised dishes, but not for high-temperature, quick-cook methods like stir-frying or deep-frying. Recognizing these limitations helps you plan appropriate recipes, avoid frustration, and ensure food safety and quality.
Troubleshooting Common Solar Cooking Challenges
Sunlight isn’t always reliable. If your food isn’t cooking, check the weather first—heavy clouds, wind, or shadows can significantly reduce heat. Reposition your cooker to face the sun directly, and make sure reflective panels are clean and angled properly to maximize sunlight capture. Small adjustments can make a big difference in cooking times and efficiency.
If your food is cooking unevenly or taking too long, consider chopping ingredients smaller to increase surface area and heat absorption, or adding extra time. Using a thermometer helps you judge doneness without guesswork, reducing waste and ensuring safety.
For example, if your baked potatoes are still firm after 3 hours, try wrapping them in foil or placing them closer to the reflector to concentrate heat. Patience and small, informed adjustments are key — understanding how weather, positioning, and equipment affect heat gain allows you to troubleshoot effectively and improve your results over time.
Frequently Asked Questions
Can a solar oven cook on a cloudy day?
Thin clouds may slow cooking but won’t stop it entirely. Heavy cloud cover can prevent proper heating, so have a backup method ready for perishables. Keep in mind, the brighter the day, the faster your food will cook.
Does it have to be hot outside?
No. While outdoor air temperature can influence cooking speed, strong, direct sunlight is the key. Even in cold weather, a sunny day can produce enough heat for slow cooking, but wind and lower sun angles might extend cooking times.
How long does solar cooking take?
Expect 1.5 to 4 hours for most recipes like rice, potatoes, or stews. It’s important to plan ahead, as solar cooking tends to be slower than conventional oven baking — sometimes two to three times longer, depending on weather and equipment.
Do I need special cookware?
Not necessarily. Dark, lightweight, oven-safe pots with tight-fitting lids work best. Cast iron absorbs heat well but is heavier. Avoid shiny or reflective cookware unless used intentionally for reflectors or insulation.
Can I cook meat safely in a solar oven?
Yes, if the meat reaches the recommended internal temperature: 165°F for poultry, 160°F for ground meats, and 145°F plus resting for whole cuts. Use a food thermometer to be sure and finish cooking in a conventional oven if needed.
Conclusion
Solar cooking isn’t about quick meals; it’s about patience, simplicity, and harnessing free, renewable energy. As your skills grow, you’ll see how slow, steady heat can turn humble ingredients into satisfying dishes. Every sunny day is a new chance to master the art of off-grid, fuel-free cooking — one delicious meal at a time.Fall Picks
fall essentials
As an affiliate, we earn on qualifying purchases.