
TL;DR

Get kitchen gear delivered free — and shop member deals
- Fast, free delivery on millions of items
- Access to Prime Big Deal Days deals on October 6–7
- Prime Video, Amazon Music and more included
The AeroPress combines immersion and pressure to brew rich coffee in 2-3 minutes. Adjusting grind size, water temp, and technique allows for personalized, high-quality results. Recent trends include inverted brewing and eco-friendly filters.
Use medium-fine grind, similar to salt, for balanced extraction.
Experiment with water temperature: cooler for clarity, hotter for richness.
Steep times of 30-60 seconds influence strength and flavor profile.
Inverted AeroPress can boost body and flavor control, especially for longer brews.
Small tweaks—like grind size or steep time—totally change your coffee experience.
What makes the AeroPress different from other coffee makers?
The AeroPress stands out because it combines immersion brewing with pressure. Unlike a pour-over or French press, it uses a plunger to push hot water through coffee grounds, extracting flavors quickly and efficiently. This results in a clean, full-bodied cup that’s rich but smooth. Its compact size and durability make it perfect for off-grid adventures or quick mornings at home.
This combination matters because immersion allows the coffee grounds to be fully saturated, extracting a broad spectrum of flavors, while pressure helps to intensify extraction and produce a richer, more concentrated brew. The tradeoff is that the process requires a bit of technique to avoid over-extraction, which can lead to bitterness. Understanding these nuances enables you to manipulate variables—such as steep time and pressure—to tailor your brew to your taste preferences, whether you want a bright, clean cup or a bold, full-bodied shot.
As an affiliate, we earn on qualifying purchases.
Gather your gear: what you need to get started
All you need is the AeroPress itself, a paper or metal filter, your favorite coffee, and hot water. A sturdy mug or container to hold the brew is essential. Optional accessories like a stir stick, a scale, or a timer can help fine-tune your process. Here’s a quick checklist:
- AeroPress device
- Filter cap and filters
- Fresh coffee beans (medium-fine grind)
- Hot water (about 175-205°F)
- A stirring tool
- A timer or clock
Choosing the right accessories can make a difference. For example, a scale allows precise measurement, ensuring consistency in your recipes. A timer helps you control steep time, which directly impacts flavor. A stir stick ensures even extraction, especially with denser grounds or larger batches. Think of these tools as the calibration devices in a professional kitchen—they help you achieve repeatable, high-quality results every time.
As an affiliate, we earn on qualifying purchases.
Step 1: Prep your AeroPress for brewing
Start by inserting a filter into the cap. Rinse the filter with hot water to remove any paper taste and to help it adhere better, which also prevents clogging. Screw the cap onto the AeroPress securely. Place the device on your mug or container to stabilize it. Measure 14-18 grams of medium-fine coffee grounds—think of salt or sugar granules—and add them into the chamber. Using a consistent amount ensures your brew’s strength remains predictable, but experimenting with slightly more or less can help you find your ideal profile.
Proper prep makes a difference because it ensures cleanliness, prevents off-flavors, and sets the stage for even extraction. For example, rinsing the filter not only clears residual paper taste but also improves water flow, reducing the risk of clogging. This small step can make a big difference in the clarity and balance of your final cup.
As an affiliate, we earn on qualifying purchases.
Step 2: Add hot water and steep
Pour hot water up to the numbered line or about 200 ml for a standard brew. Use water between 175°F and 205°F; cooler water emphasizes clarity and brightness, while hotter water enhances richness and body. Stir gently for 10 seconds to ensure even saturation, similar to how a chef stirs a delicate sauce. Then, let it steep for 30-60 seconds, depending on your desired strength and flavor profile. For example, a shorter steep yields a lighter cup, while a longer steep intensifies the body and depth.
This step is crucial because water temperature and steep time directly influence extraction. Cooler water reduces extraction of bitter compounds, resulting in a cleaner taste, whereas hotter water extracts more oils and solubles, producing a fuller-bodied brew. Adjusting steep time allows you to control the balance between brightness and richness, much like tuning a musical instrument to achieve the perfect harmony.
As an affiliate, we earn on qualifying purchases.
Step 3: Press your coffee — the critical moment
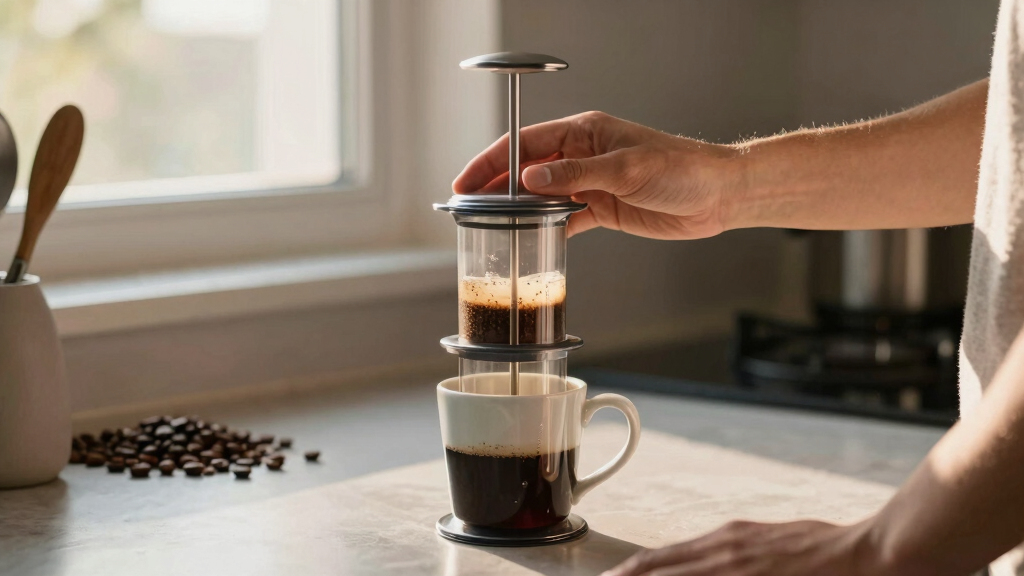
Insert the plunger and press down steadily with consistent pressure. You should feel resistance but not excessive force—think of pressing a syringe gently to avoid breaking the seal. Aim to finish pressing in 20-30 seconds; rushing can cause over-extraction, leading to bitterness, while too slow may under-extract, resulting in a weak flavor. The sound of the coffee flowing through the filter is satisfying—like a gentle rain over your coffee grounds, signaling that extraction is complete. A controlled, steady pressure ensures you extract the right flavors without pushing bitter compounds into your cup.
Think of this process as squeezing the last bit of juice from a fruit—too hard and you release bitter pith; too soft and you miss the richness. Practicing consistent pressure helps you develop a feel for the right force, much like a barista calibrates their tamp pressure for espresso. This balance is key to achieving that perfect, well-rounded flavor profile.
Step 4: Enjoy or customize your brew
Remove the AeroPress from your mug, unscrew the cap, and eject the coffee puck. Taste your brew and evaluate its flavor. If you prefer a clearer, brighter cup, use a paper filter to trap oils and fine particles. For a richer, more textured experience, try a metal filter that allows more oils through. You can also experiment with brew times, water temperatures, or coffee amounts to customize the flavor. For example, extending steep time or increasing grind fineness can deepen the body, while reducing steep time brightens the cup. Think of these tweaks as adjusting the seasoning in a recipe—small changes can dramatically alter the final taste, allowing you to craft your ideal coffee profile.
The inverted AeroPress: why it’s a game changer
The inverted method flips the AeroPress upside down before brewing, which prevents the coffee from dripping through prematurely. This technique allows for longer steep times without risking a messy overflow, resulting in a richer, more balanced extraction. Imagine brewing a French press but with more control over steep time and pressure—this method gives you a fuller-bodied cup with more pronounced flavors. For instance, you can steep for two minutes with the inverted method, extracting deeper notes like chocolate or caramel, and then press with a steady, gentle force to preserve clarity. The tradeoff is that it requires a bit of practice to set up correctly, but once mastered, it unlocks a new level of flavor control.
In essence, the inverted AeroPress is like giving yourself a miniature espresso machine that lets you fine-tune every aspect of your brew, making it a favorite among enthusiasts seeking maximum flavor potential.
Compare AeroPress to other brewing methods in a quick table
| Feature | AeroPress | French Press | Pour-Over |
|---|---|---|---|
| Time to brew | 2-3 minutes | 4-5 minutes | 3-4 minutes |
| Clean-up | Quick, eject puck | Disassemble and rinse | Rinse dripper |
| Flavor profile | Full-bodied, smooth | Rich, sometimes oily | Clean, bright |
Understanding these differences helps you choose the right method for your taste and lifestyle. For example, if you value speed and portability, the AeroPress is ideal. If you prefer a more nuanced, complex flavor with time for sediment settling, a French press or pour-over might suit you better. Recognizing the tradeoffs allows you to optimize your brewing process based on your priorities—whether that’s clarity, body, or convenience.
Troubleshooting: common issues and fixes
If your coffee tastes weak, try using a finer grind or increasing brew time. Overly bitter or over-extracted coffee? Use a coarser grind or reduce steep time. Too much resistance when pressing? Check your water temp—cooler water can help. Remember: small adjustments make a big difference. For example, if your brew is consistently weak, it might be because the grind is too coarse, preventing proper extraction. Conversely, if it’s overly bitter, the grounds might be too fine or steeped too long. Each parameter interacts—changing one can influence the others. Think of it as fine-tuning a musical instrument: patience and small adjustments lead to harmony.
For instance, if you notice your coffee is too sour, it may be under-extracted due to low temperature or insufficient steep time. Increasing either can help balance acidity and enhance sweetness. Conversely, if it’s too bitter, reducing steep time or coarsening the grind can prevent over-extraction. This iterative process is key to discovering your perfect brew, much like a chef perfects a sauce by tasting and adjusting seasonings.
Recent trends: what’s new in AeroPress brewing?
From inverted brewing to cold steep, enthusiasts are pushing AeroPress’s limits. The annual AeroPress World Championship showcases innovative recipes, like layering flavors or using different water temperatures. For example, some baristas experiment with adding spices or flavor extracts during steeping, creating complex profiles akin to craft cocktails. Additionally, eco-friendly reusable filters are gaining popularity, reducing waste and making the process more sustainable. These innovations reflect a community dedicated to refining the art and science of AeroPress brewing, transforming it from a simple device into a versatile tool for creative coffee expression.
Imagine experimenting with a cold brew concentrate, then hot-waving it with spices for a spiced latte, or using a metal filter to capture more oils and create a richer texture. These trends show that AeroPress isn’t static—it’s evolving into a platform for experimentation, much like a chef developing new recipes. Embracing these innovations allows you to explore new flavor territories and elevate your coffee experience to professional levels.
Frequently Asked Questions
Can I make espresso with an AeroPress?
While not true espresso, the AeroPress can produce a concentrated shot similar to espresso by using a fine grind and pressing with high pressure. It’s a great off-grid alternative for a rich, intense coffee.What grind size should I use?
A medium-fine grind, like table salt, works best. Too fine can clog filters or cause over-extraction, while too coarse results in weak flavor.How long should I steep the coffee?
Typically 30-60 seconds. Longer steeping can deepen flavor but risks over-extraction. Adjust based on your taste preferences and brewing style.Are metal filters better than paper?
Metal filters allow oils and fine particles through, producing a richer, fuller-bodied brew. Paper filters yield a cleaner, brighter cup. Choose based on your flavor preference and sustainability goals.How do I troubleshoot weak or bitter coffee?
Adjust grind size, water temperature, and steep time. Fine-tune each parameter slowly until you find the perfect balance for your taste.Conclusion
With the AeroPress, precision and practice turn simple steps into extraordinary coffee. Whether you’re off-grid or just seeking a better cup, mastering this method unlocks a world of flavor. Keep experimenting, and soon you’ll be brewing coffee that rivals your favorite café — right in your own kitchen or campsite.Halloween Picks
halloween
As an affiliate, we earn on qualifying purchases.