TL;DR

Get kitchen gear delivered free with Prime
- Fast, free delivery on millions of items
- Prime Video, Amazon Music and more included
- Member-only deals all year
Canning for beginners is about following tested recipes, using proper equipment, and understanding safety rules. This step-by-step guide walks you through the essentials for safe, successful food preservation at home.
Ever tasted a jar of homemade jam that tastes better than anything store-bought? Or wondered how to keep your summer tomatoes fresh for months? Canning turns seasonal bounty into pantry staples, but it’s more than just sealing jars. It’s about safety, skill, and patience. If you’re new to it, don’t worry. This guide will walk you through each step, so you can preserve your food confidently and safely at home.
Think of canning as a way to connect with your food — a simple act that locks in flavor, preserves nutrients, and gives you control over what goes into your jar. Whether you want to make a batch of strawberry jam or preserve garden vegetables, understanding the basics makes the process straightforward. Ready to get started? Let’s break down what you need and how to do it right.
Always use tested recipes from reliable sources; safety depends on precise processing times and acidity levels.
Proper equipment, especially a good pressure canner for low-acid foods, is essential for safety and ease.
Follow step-by-step procedures: prepare, fill, remove air, seal, process, and store carefully.
Label jars with contents and date; store in a cool, dark place to maximize shelf life.
Stay updated on food safety guidelines and explore new recipes to keep canning fresh and exciting.
Know Your Canning Methods — Water Bath vs. Pressure Canning
The first step in your canning journey is understanding the two main methods: water bath canning and pressure canning. Water bath is simple — you submerge jars in boiling water. It’s perfect for high-acid foods like jams, jellies, pickles, and fruit preserves. The acidity in these foods creates an environment hostile to bacteria, especially botulism, making water bath canning a reliable method for these items. However, for low-acid foods such as vegetables, meats, and soups, the risk of bacterial growth is higher because they lack sufficient acidity. That’s where pressure canning becomes essential, as it reaches higher temperatures needed to destroy bacteria and spores that can survive boiling water temperatures.
Choosing the correct method isn’t just about following a recipe—it’s about understanding the risks involved. Using water bath canning for low-acid foods can lead to dangerous bacterial growth, including botulism, which can be deadly. Conversely, over-pressurizing or using pressure canners improperly on high-acid foods can compromise food quality or safety. Knowing the science behind these methods helps you make informed choices, ensuring your preserved foods are safe and shelf-stable.
Getting this right means your efforts won’t just result in tasty jars but also peace of mind. Proper technique and understanding the science behind each method are key to long-term success and safety in home canning.
As an affiliate, we earn on qualifying purchases.
Essential Equipment You Need to Start Canning
Starting out requires some reliable tools. A basic kit includes
- Jars with lids (preferably Mason jars)
- A canning pot or water bath canner
- A pressure canner for low-acid foods
- Tools like a jar lifter, funnel, bubble remover, and headspace tool
- Clean workspace and sterilization supplies
Investing in the right equipment isn’t just about convenience; it’s about ensuring safety and consistency. For example, using a proper canning jar lifter reduces the risk of burns or breakage when handling hot jars. A quality pressure canner is designed to maintain the correct pressure and temperature, which is vital for destroying harmful bacteria in low-acid foods. Inadequate or faulty equipment can lead to underprocessing, risking spoilage or botulism.
Sterilizing jars and lids properly prevents contamination, which is especially critical when preserving low-acid foods. While some tools are simple, skimping on quality—like using cheap lids or a subpar canner—can compromise the safety and longevity of your canned goods. Think of your equipment as the foundation of safe canning; investing in dependable tools ensures your preserved foods remain safe and delicious over time.
Remember, safety and quality are non-negotiable. Proper equipment and careful handling are what turn home-canned foods from a risk into a rewarding experience.
pressure canner for low acid foods
As an affiliate, we earn on qualifying purchases.
As an affiliate, we earn on qualifying purchases.
Follow Tested Recipes — Your Food’s Safety Depends on It
Using recipes tested by experts isn’t just a recommendation—it’s a necessity. These recipes have been carefully developed and validated to ensure the correct balance of acidity, sugar, and processing time, which are critical factors for preventing spoilage and bacterial growth. When you deviate from tested recipes, you risk creating environments where harmful bacteria, like Clostridium botulinum, can survive and produce toxins. This is especially dangerous because botulinum toxin is odorless, colorless, and can be deadly.
For example, a USDA-approved strawberry jam recipe or one from a trusted canning guide like the Ball Blue Book provides precise instructions on how much sugar, pectin, and processing time are needed to achieve a safe, shelf-stable product. These recipes have undergone rigorous testing to balance safety with quality, ensuring your jam won’t spoil or develop harmful bacteria. Following them exactly isn’t just about safety—it’s about consistency, flavor, and peace of mind.
Always double-check the processing instructions—temperature, time, and method—before starting. Tinkering with recipes or shortening processing times may seem harmless but can have serious safety implications. Reliable recipes serve as your safety net, guiding you to produce delicious, safe preserves every time. Remember, safety is the foundation upon which enjoyable home canning is built.
As an affiliate, we earn on qualifying purchases.
Step-by-Step Canning Process — How to Do It Right
Here’s a simple outline to get you started:
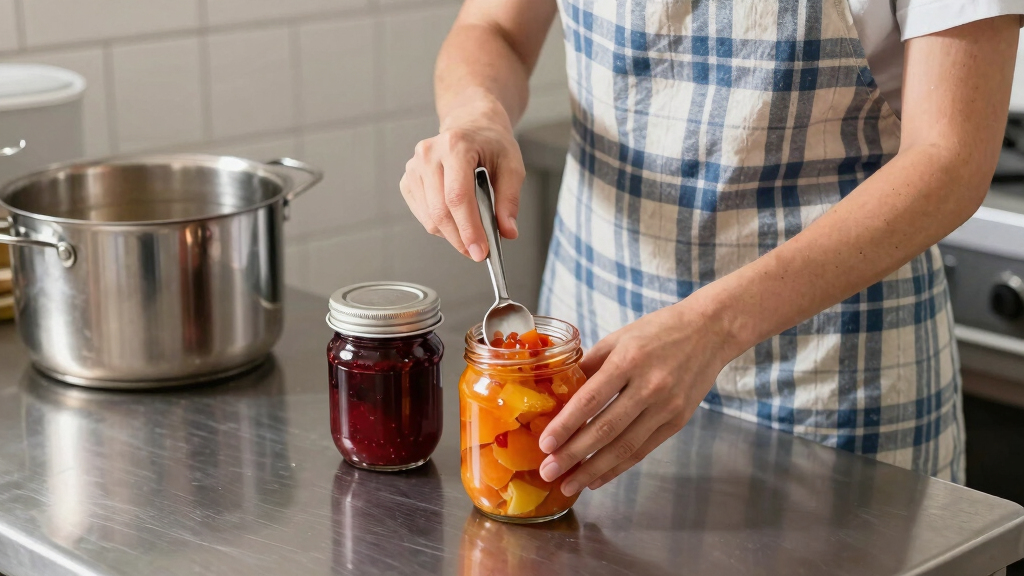
- Prepare your food: wash, peel, chop, or cook as needed. Proper preparation ensures even processing and reduces contamination risks.
- Sterilize jars and lids by boiling or in the dishwasher. Proper sterilization prevents microbial contamination that can spoil your food or cause foodborne illnesses.
- Fill jars with prepared food, leaving the right headspace (usually ¼ to ½ inch). Adequate headspace allows for proper sealing and expansion during processing, preventing spoilage or jar breakage.
- Remove air bubbles with a bubble remover or chopstick. Eliminating trapped air ensures a proper vacuum seal and prevents bacterial growth.
- Wipe jar rims clean to ensure a good seal. Any residue can interfere with sealing, risking spoilage or contamination.
- Place lids and screw on rings finger-tight. Over-tightening can prevent air from escaping, while loose rings can lead to improper seals.
- Process jars in boiling water (for high-acid foods) or pressure (for low-acid foods) according to tested times. Accurate processing destroys bacteria and spores, ensuring safety and long shelf life.
- Let jars cool undisturbed. You’ll hear a popping sound as they seal. Do not disturb jars during cooling to prevent broken seals or compromised safety.
- Check seals — lids should be concave and not flex when pressed. Proper sealing indicates vacuum formation, essential for long-term shelf stability.
For example, when canning peaches, you peel, slice, pack in jars, and process in boiling water for about 30 minutes. This process destroys bacteria and enzymes that cause spoilage, preserving the fruit’s flavor and texture. Understanding each step’s purpose helps you execute the process confidently and safely. Patience and attention to detail are your best tools for successful canning.
As an affiliate, we earn on qualifying purchases.
Storing Canned Food — Keep It Fresh and Safe
Proper storage is vital to maintaining the quality and safety of your canned foods over time. Store jars in a cool (ideally 50-70°F), dark, dry place like a cellar or pantry. Light and heat accelerate spoilage and can weaken jar seals, increasing the risk of contamination. Consistent, cool temperatures slow down enzyme activity and microbial growth, extending shelf life and preserving flavor and nutrients.
Label each jar with contents and date—this practice helps you prioritize older jars and track freshness. For instance, a jar of homemade tomato sauce stored for over a year may degrade in quality, even if still sealed, so timely use is recommended. Proper labeling also prevents accidental consumption of spoiled or unsafe food.
Check jars periodically for signs of spoilage: broken seals, bulging lids, mold, or foul smells. If any of these are present, discard the contents immediately. Proper storage and handling are your last line of defense against spoilage and foodborne illness, ensuring your efforts in canning remain safe and rewarding over months or even years.
Latest Trends and Tips for Home Canning
Recent trends reflect a shift toward healthier, more sustainable, and innovative approaches. For example, many home canners are exploring plant-based recipes such as fermented vegetables, probiotic-rich ferments like sauerkraut and kimchi, and low-sugar jams that cater to health-conscious consumers. These trends emphasize flavor complexity and nutritional value, making canning more versatile and appealing.
Technological advancements, like digital pressure canners with built-in safety features and precise temperature controls, have made the process easier and more reliable for beginners. Community workshops, online tutorials, and virtual classes are also empowering new canners to learn best practices and troubleshoot common issues, reducing mistakes and increasing confidence.
Growing your own produce simplifies sourcing ingredients and ensures freshness, which is especially important for raw ferments or seasonal preserves. For instance, fermenting your garden cucumbers into homemade pickles or experimenting with low-sugar berry jams not only adds variety but also aligns with current health trends. Staying informed about safety guidelines and emerging recipes ensures your canning remains both safe and innovative, keeping the craft exciting and sustainable.
Important Facts Beginners Should Know
Understanding the science behind canning is crucial for safety and success. Properly processed foods can last 1-2 years or longer if stored correctly, but this depends heavily on correct procedures. Using tested recipes and precise processing times is non-negotiable—deviating from these can create unsafe environments where bacteria, especially botulism spores, can survive and produce deadly toxins. The acidity level of your food determines whether water bath or pressure canning is needed. High-acid foods like jams and pickles can be safely water bath canned, while low-acid foods such as green beans or meats require pressure processing to eliminate bacterial spores.
Always inspect jars before use. Sealed jars should have a flat, concave lid that doesn’t flex when pressed. If the seal is broken or the lid flexes, the food may be compromised and should be discarded. While canned foods are best used within two years, proper storage conditions can extend shelf life, but always look for signs of spoilage: mold, foul odors, or bulging lids. Understanding these key facts helps you make informed decisions and prevents foodborne illnesses, ensuring your canning efforts are safe and effective.
In short, canning combines scientific principles with careful attention to detail. Knowing the critical safety factors ensures your preserved foods remain safe, nutritious, and enjoyable for as long as possible.
Common Questions — Clear Answers for New Canners
Is canning safe for beginners? Absolutely, if you follow tested recipes and proper techniques. It’s straightforward once you understand the basics. The key is to be diligent about procedures, as shortcuts or assumptions can lead to unsafe products. Learning the science behind each step helps you recognize potential pitfalls and avoid them, making the process safer and more rewarding.
What equipment do I need to start? Jars, lids, a canner (water bath or pressure), and some tools like a funnel and jar lifter. Reliable, food-grade equipment is essential—cheap or poorly made tools can jeopardize safety by causing improper sealing or contamination. Investing in quality gear ensures consistent results and peace of mind.
Can I can low-acid foods in a water bath canner? No. Low-acid foods like vegetables, meats, and soups require pressure canning because boiling water temperatures are insufficient to destroy spores of bacteria like Clostridium botulinum. Using a water bath for these foods is unsafe and can lead to serious health risks.
How do I know if my jars are sealed properly? Proper seals are flat, concave lids that don’t flex when pressed. Once cooled, pressing the center of the lid should not produce a clicking or flexing sensation. If a seal isn’t formed, the jar may not be safe—refrigerate and consume promptly or re-process if appropriate.
How long do canned foods last? Typically 1-2 years if stored in optimal conditions, but always check for signs of spoilage before eating. Proper sealing and storage extend shelf life, but quality diminishes over time. Use your senses—look, smell, and inspect for any signs of spoilage to ensure safety.
Are there beginner-friendly recipes? Yes—start with jams, jellies, pickles, or fruit preserves. These tend to be more forgiving, have shorter processing times, and are excellent for building confidence. As you gain experience, you can explore more complex recipes involving low-acid ingredients.
What are common mistakes to avoid? Not following tested recipes, improper sealing, underprocessing, and contamination are the top culprits. Rushing steps, using old or damaged jars, or neglecting proper sterilization can lead to unsafe products. Paying attention to detail and adhering strictly to guidelines minimizes these risks and ensures your canned foods are both safe and delicious.
Conclusion
Starting with the basics means you’re already halfway there. Canning isn’t just about storage — it’s about reclaiming your food and your time. Take it slow, follow tested recipes, and focus on safety. Before you know it, you’ll have a pantry full of your own preserved treasures, ready when the season isn’t.
Now, grab those jars and get cooking. Your off-grid kitchen just got a whole lot more self-reliant — and delicious.
Halloween Picks
halloween
As an affiliate, we earn on qualifying purchases.